Reflections on 10 Simple Exercises (+ 1 bonus!) for Scoliosis and Fusions
This is Part 26 of a serial blog originally titled 'Martha Carter's Healing Journey'. In Part 25, I find inspiration in my veggie garden and a theme that has been emblematic of my experience throughout this healing journey: patience. In Part 24, I share a ‘confession’ about an emotional and physical rollercoaster experience while attending a retreat in March 2019. Missed the earlier posts? Read Part 1, Part 2, Part 3, Part 4, Part 5, Part 6, Part 7, Part 8, Part 9, Part 10, Part 11, Part 12, Part 13, Part 14, Part 15, Part 16, Part 17, Part 18, Part 19, Part 20, Part 21, Part 22 and Part 23.
***
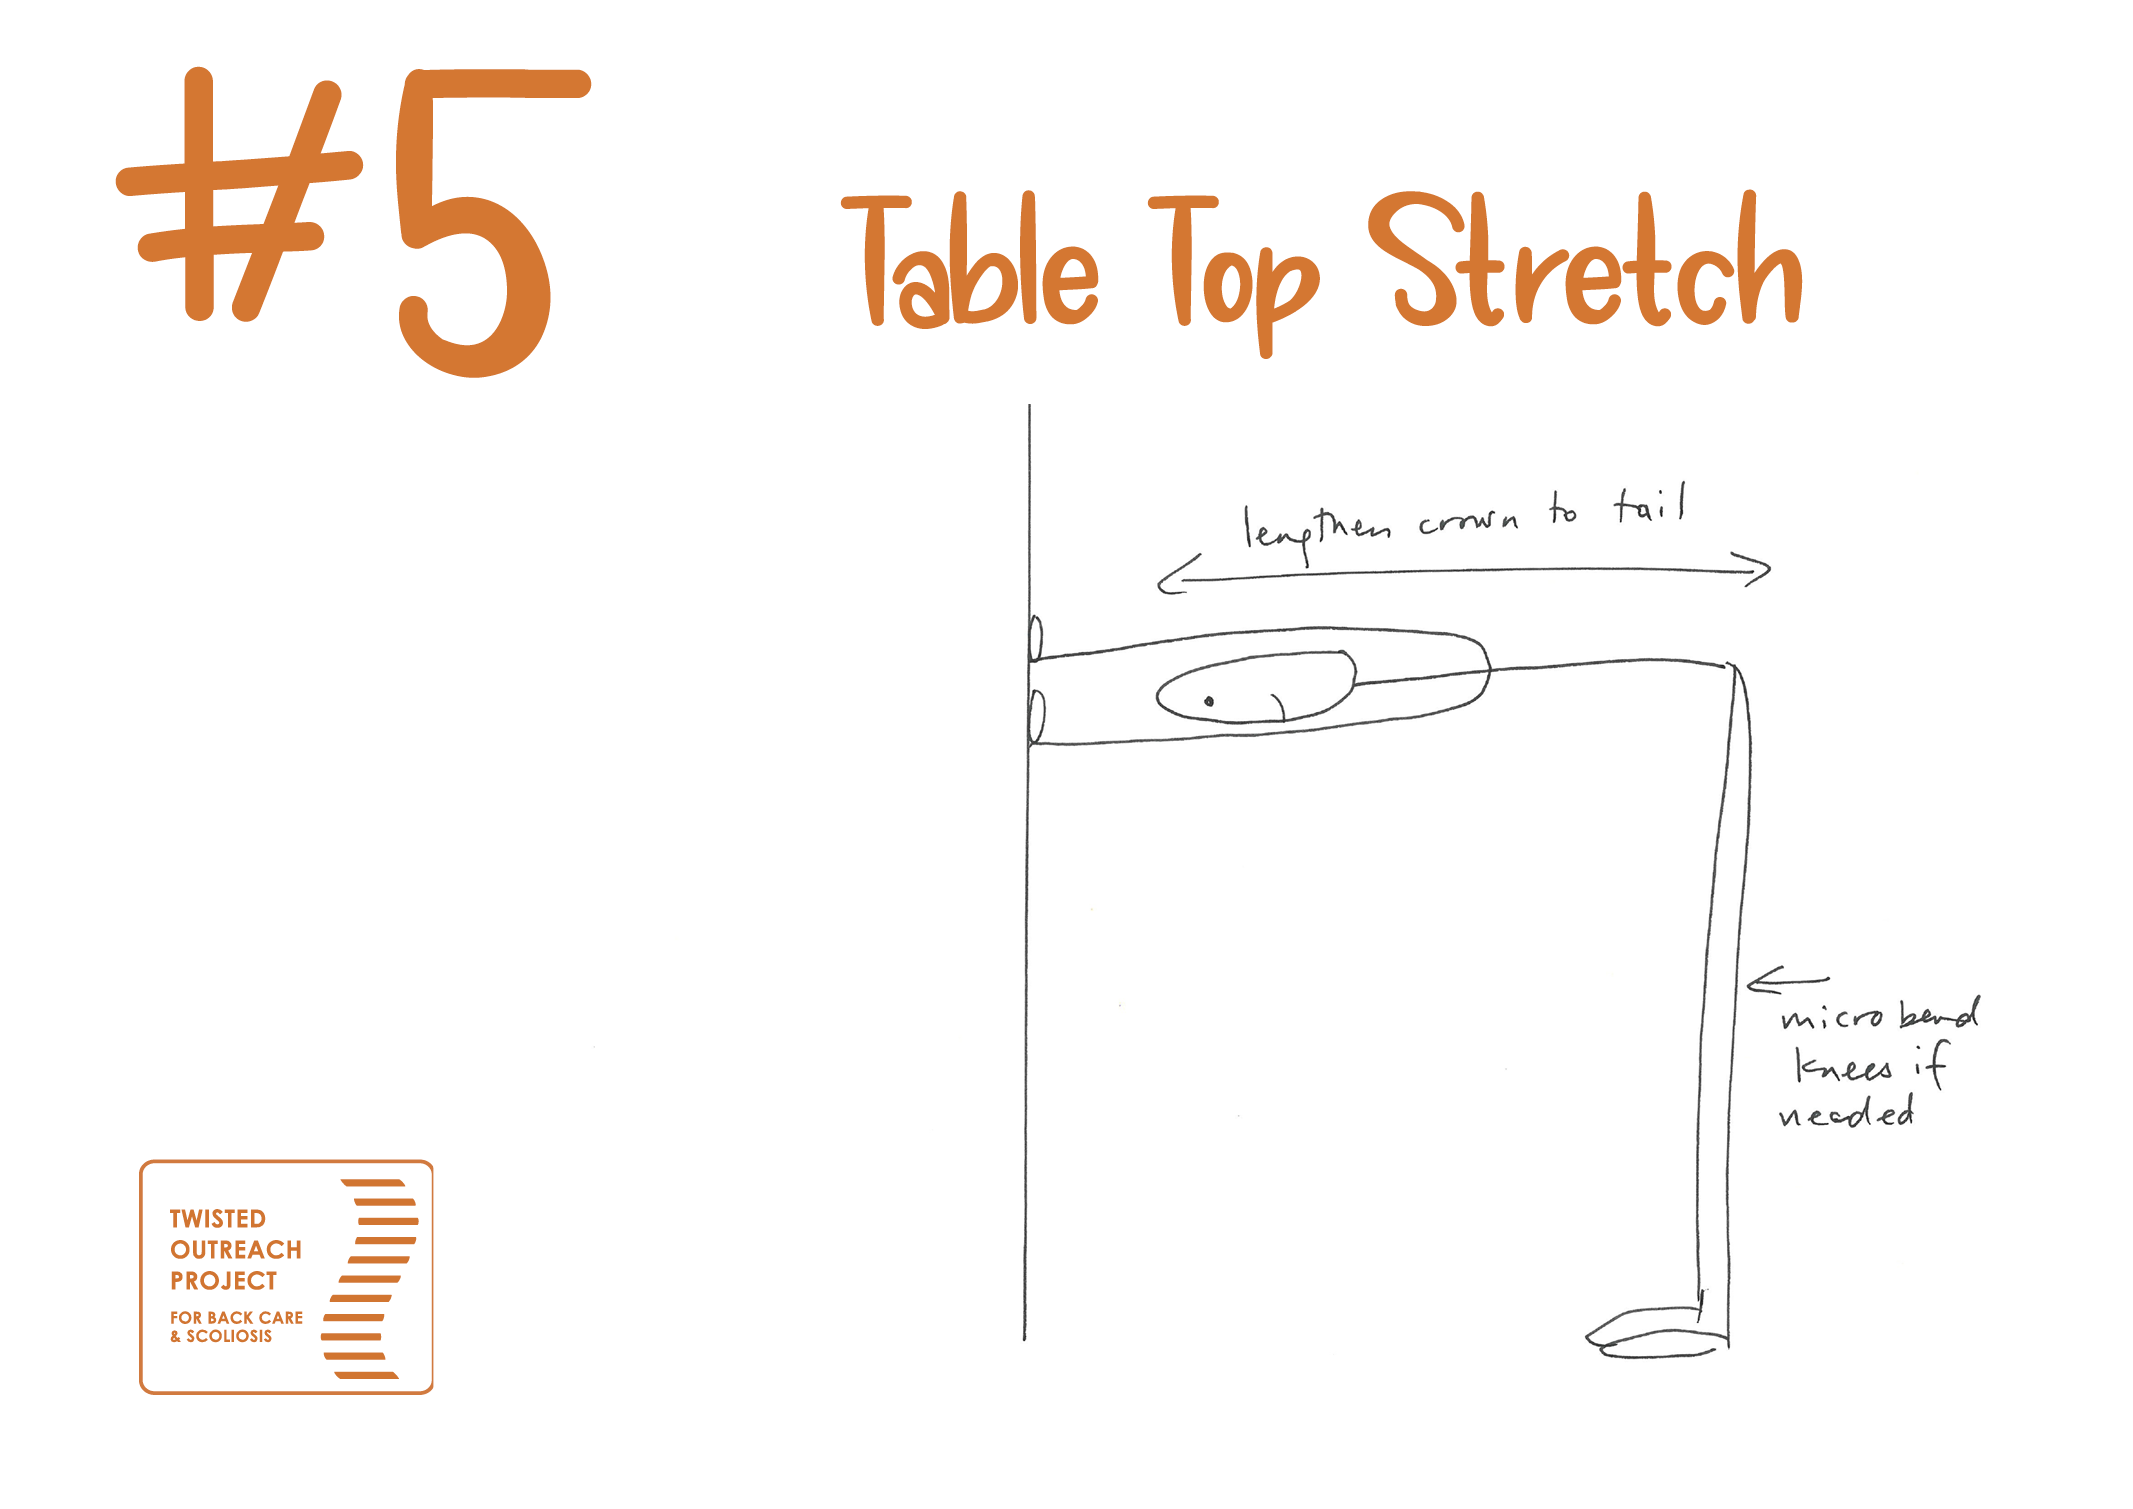
In celebration of National Scoliosis Awareness month, I shared 10 Simple Exercises for Scoliosis and Fusions over the month of June via my slightly embarrassing but cute stick-figure drawings :)
They are truly simple, but they are also very effective. And they are accumulative.
The more you practice them, the more powerful they become.
In fact, their simplicity is deceiving. Pretty much anyone can get into these positions, but just doing them isn’t enough. Even though you can do the pose, it doesn’t mean that they will make a difference for you. The magic lies in HOW you do the exercises.
To assist with this, here are 10 Simple TIPS (+ 1 bonus!) for working with Scoliosis and Fusions. And come to think of it, these tips can apply to any movement practice, not only the 10 Simple Exercises!
For reference, you can remind yourself of the 10 Simple Exercises for Scoliosis and Fusions by looking through our Media Gallery here (and then scroll down for the TIPS!):


TIP #1: Be Mindful of Your Sequence.
While doing targeted scoliosis exercises, I find it helpful to focus on the following actions, and in this approximate order (ie: if you start with strengthening exercises, then you are just tightening and reinforcing your scoliotic pattern, rather than softening and lengthening it!):
Breathe (exercises 1, 2, 3).
Decompress and lengthen your spine (exercises 3, 4, 8, 9, 10, 11).
Repattern (exercises 4, 5, 6, 8, 9, 10).
Strengthen (exercises 5, 7, 9).
TO FINISH:
Restore. Relax and integrate by doing restorative poses, like Sivasana (not pictured in my stick drawing exercises).
TIP #2: Practice Breathing.
There are many helpful breathing and meditation practices to be learned. Unfortunately, the first ones I tried felt uncomfortable because I was never happy in the required sitting position. I hadn’t yet learned to ask for what my curve pattern and fusion needed. So after many years of procrastination, one day I finally said to myself… ”Ok Martha, just take ten ‘friggin’ breaths and get it over with!!!”
And from that moment forward, I have used a daily practice that I call my ‘TEN FRIGGIN BREATHS’ technique, which is basically taking ten deep breaths! And using this, I have gradually developed a comfortable breathing and meditation practice that has positively transformed my well being... and my life... in every way.
TIP #3: Breathe into Your Concavities.
I cannot stress enough how important it is for people with scoliosis to learn their own curve pattern, and for folks with fusions to learn which vertebrae are involved in their fusion pattern.
By identifying your own unique concavities, you can learn to focus your breathing into those areas. Over time, this will strengthen and activate the weaker muscles of the concavity, while giving a break to the overworked muscles of the convexity - in order to help you find new balance and strength in your back.
TIP #4: Less Can Be More. Set Realistic Goals.
Often we feel like we need to be ‘athletic’ and ‘work hard’ when we do a physical practice. Of course, there is a time and place for dynamic workouts, but there are also times for a ‘work-in’ - times when it is much more helpful to take it slow and gentle. Learn to read your own body, and to make choices that work for you and your goals (AND make sure your goals are realistic!).
TIP #5: Understand Your Intentions - How to Set Realistic Goals.
When working with a challenging condition like scoliosis, especially for people who are fused, it is important to remember that the goal of the exercises is not to ‘straighten’ or ‘cure’ the spine. For me, the goal of targeted exercises is to find optimum mobility, articulation, length, and strength in the spine - if not the whole body. That is a good direction to aim for.
Occasionally, people have success in decreasing their curvature, but a realistic first goal is to find comfort and balance.
To set your goals, consider these four questions:
Are you sure you are ready for targeted exercises, or do you need to find some other kind of help first, such as massage or another kind of Supportive Care?
What level of exercise feels right for your body / age / ability?
Do you feel that you have enough information to start your own home practice, or do you need more instruction? (ie: through classes, a workshop, a retreat, or private consultation)?
Do you know how to find the help you are looking for? (If not, feel free to contact us for suggestions near you!)
TIP #6: Take One Step at a Time.
When learning new exercises, it is tempting to want to be able to do them all fully - right away. And that is one of those goals that is completely unrealistic! When we are afraid of doing something ‘wrong’, it becomes easy to procrastinate, and then we judge ourselves harshly for procrastinating! The trick is to ease into each exercise and make it work for you. Start simply by just getting into the position. Try them out. Find the ones you like doing, and repeat them until you are ready to try another one… and then another one, etc. If you desire and when you are ready, there are always ways to evolve your practise by studying through classes, workshops, retreats, books, online videos, or privates!
TIP #7: Every Day is Different.
It can be difficult to find a steady balance between the distractions of daily life and a mindful bodywork practice or exercise regime. Many elements, including family dynamics, work pressures, weather patterns, room temperature, body temperature, body state, mental state, digestion, etc, can dramatically affect how you feel in general - let alone how you feel when doing exercises. Take time to observe and accept the differences you experience from day to day. Just because one day feels easier or harder than another does not mean you are doing something right or wrong. You are just doing - and that is already something.
TIP #8: Seek Comfort. Use Props.
Doing the Simple Exercises that I’ve drawn should not cause any pain or distress. That said, even simple exercises can cause new body sensations, such as achiness, awareness of tight muscles, or even slight dizziness and nausea. These are normal reactions… as long as they are not overly dramatic or long-lasting.
Find more comfort by using props to modify each pose to make them as comfortable as possible for your particular body. Use a wall or a chair, or enhance the poses with slant boards, straps, foam blocks, bolsters, and blankets. You can find lots of ideas online!
TIP #9: The Goddess is in the Details
Pay attention to the details of each exercise and how one little shift can make a big difference. For example, in Simple Exercise #2: Sitting in a Chair, doing the pose while leaning on the back of the chair feels completely different than doing it while sitting up tall with your own strength.Or, if you shift your weight onto one foot more than the other, or tilt your head to one side more than the other, it will shift the whole position and the pose will be very different. Observe your body position and aim for dynamic symmetry. Note how you feel, and whether or not you need to shift, even just a tiny bit. Focus your breath into your whole torso, with an extra focus on your concavity.
TIP #10: Be Gentle with Your Self-Talk. Get Your Thoughts in Order.
I recently came across this quote from actor Naomi Judd, who said:
“Your body hears everything your mind says.”
In other words, your inner dialogue is important. Keep it positive!
TIP #11: Necessity is the Mother of Invention: Get Creative. Have Fun!
Body techniques are full of intricate details, which can be helpful, but they can also be confusing. People often comment that they have trouble remembering all the details, let alone the name of the position, or how to get into it. Or they will ask me what poses are best or safest for them. My answer is usually some version of this list of tips — be mindful, know your own curve, keep it simple, be gentle, go gradually, take one step at a time, etc.
And I also encourage people to remember that rules are made to be broken. There is not just ONE WAY to do these poses. Assuming you are being safe and gentle, feel free to get creative and see what works for you. You don’t always need to deeply understand everything before you start. Just start! Try the exercises and see which ones work for you. Observe yourself and make adjustments as you go.
***
Still unsure how to approach exercises for your own scoliosis or fusion?
Feel free to write us or book a private to reinforce your knowledge.
Read Martha’s next blog post here.
Got comments? Please feel free to write us anytime.